Using Leganto Social Annotation in Canvas Course Reserves

What is the Leganto Social Annotation tool? 

Leganto’s social annotation tool allows instructors and students to engage directly with course readings by highlighting text, adding comments, asking questions, and responding to each other within a PDF. Social annotation is accessed through your Leganto Course Reserves reading list in Canvas and can be used to encourage active reading, critical thinking, and collaborative learning. Faculty may continue to use Social Annotation to promote engagement, discussion, and active reading, but should plan to manage grading workflows outside of the direct Leganto-to-Canvas grade sync process. See the interface view below. 

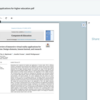
Screenshot of the Leganto social annotation interface. As a user selects a comment, the related text is highlighted.

Social Annotation With Leganto

Once your PDF has been uploaded (see Faculty Setup section for setting up your documents) to Leganto and is available in your Canvas Course Reserves reading list, follow these steps to begin annotating. Social Annotation allows instructors and students to highlight text, add comments, and participate in discussions directly within the document. 

How-To: Social Annotation With Leganto

Open the PDF 

  1. Navigate to Course Materials/Course Reserves in Canvas. 

  2. Open your Leganto reading list. 

  3. identify the PDF you want to annotate & click the ‘View PDF' button. 

  4. The document will open in the Leganto PDF viewer. 

Screenshot showing how to access a PDF from the course reserves.
Screenshot indicating that the user needs to select the 'class discussion' tab to access social annotation tools.

Highlight Text & Add Comments 

  1. Click and drag your cursor over a word, phrase, or passage. 

  2. A menu will appear above the selected text. 

  3. Choose Annotate/Comment and enter your comment in the text box that appears. 

  4. Select Publish when finished. 

Screengrab displaying icon to click in order to turn on the 'comments' tool.
Higlighted text with annotation menu sowcasing the related annotation.

Reply to Existing Annotations 

  1. Locate an existing annotation in the margin or annotation panel.

  2. Select Reply

  3. Enter your response and save. 

Screenshot of student comment.
Screenshot of comment reply.

Use replies to: 

  • Answer questions 

  • Build on classmates' ideas 

  • Share additional evidence from the text 

View All Annotations  

Annotations appear: 

  • Alongside the highlighted text in the document 

  • Within the annotation panel (if enabled) 

Select an annotation to jump directly to the related passage. 

Comment Menu Options 

Set as Private: Ensure that the annotations are not marked as ‘set to private.’ Marking as ‘set to private’ will not allow others to view the annotation. 

Edit: Edit allows the user to return to their annotation and make alterations as needed. 

Delete: Delete allows the user to remove their annotation. Deleting an annotation that has a thread will delete all related replies. The delete option is permanent. 

Screenshot of menu options available in the comment panel.

Faculty Setup In Canvas

Before You Begin, Please Note: 

Leganto Social Annotation works only with PDFs uploaded directly into Leganto’s Course Reserves reading list. 

Library links, websites, databases, and e-books cannot be annotated unless they are uploaded as PDFs. 

Students access annotations through the Leganto reading list within Canvas. 

How-To: Faculty Setup In Canvas

Step 1: Open Leganto Course Reserves in Canvas 

  1. Log in to Canvas. 

  2. Open your course. 

  3. Select Course Reserves navigation link. 

  4. Open an existing reading list or create a new one. 

Screenshot point to course reserves to begin ccreating or adding to a reading list.

Step 2: Create or Open a Reading List 

Create a New List 

  1. Select Create New List. 

  2. Enter a title. 

  3. Add sections if desired (Weeks, Units, Topics, etc.). 

  4. Save. 

Screenshot showing icon to click in order to create a new course list.
Screenshot of adding title to new list.
Screenshot of drop-down menu button to open organization options for the new list.
Screenshot of new list menu options menu.

Reuse an Existing List 

  1. Select a list from a previous semester.

  2. Copy or roll it forward. 

  3. Update readings as needed. 

Screenshot showing icon to click in order to create a list from an existing list.

Step 3: Upload a PDF 

  1. Select Add Items (+). 

  2. Choose Upload Files. 

  3. Upload your PDF. 

  4. Complete citation information. 

  5. Save the item to your reading list.

Screenshot indicting that faculty should click the 'Add' button and then select 'Upload Files' to add a PDF to their list.
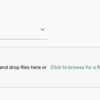
Screenshot showing window where one can drag and drop or browse to the file to be uploaded.
Screenshot of menu that appers when file is uploaded. The first drop-down menu allows user to select document type.
Screenshot of second window that appears when uploading a file. This window allows the user to type in any information that might not have populate when the document was uploaded.
Screenshot of the final, third, window that appears when uploading a document. The drop-down menu lets the user point the file to the correct list. It also includes the 'Add' button to finalize the upload.
Screenshot showing PDF in the reading list after being uploaded.

Important 

Only PDFs uploaded directly to Leganto support Social Annotation. Linked resources and websites will not display annotation tools. 

Step 4: Add Annotations 

  1. Open the PDF from your reading list by selecting ‘View PDF.’ 

  2. Highlight text. 

  3. Select Add Comment

  4. Enter a question, prompt, or observation. 

  5. Save the annotation. 

Example Prompts 

  • What is the author's main argument? 

  • How does this concept connect to our class discussion? 

  • Which passage best supports the author's conclusion? 

Step 5: Publish the Reading List 

  1. Review your materials. 

  2. Select Publish

  3. Confirm that students can access the reading list in Canvas.

Screenshot indicating that the list is unpublished and the button 'My List is Ready' to publish.
Screenshot of secondary menu that allows user to determine who will be able to see this content.
Screenshot of interface indicating that the list has been published.

Step 6: Add To Canvas Modules 

  1. Select the Share icon. 

  2. Copy Link for Canvas

  3. Navigate to the Canvas Module you would like to add the activity to and click the + icon. 

  4. Add the item as an External Tool

  5. Do not select a tool from the list provided, instead paste the link you copied into the URL box at the bottom of the scrolling window, provide a name, and check the box to Load in a new tab

  6. Select Add Item. 

  7. Verify that the item is in the module. 

Screenshot of Canvas Coursereserve window with the 'share' icon highlighted.
Screenshot of window that appears when 'share' button has been selected. 'Link to Canvas' is highlighted as the selection choice. Clicking the 'Copy Link for Canvas' will place a necessary link on the users clipboard.
Screenshot of Canvas module where the social annotation activity will reside. the '+' buton is highlighted for selection.
Screenshot of Canvas module window tht appears after the '+' button was selected. Here the "Add" drop-down menu is point the user to select 'ecternal tool.'
Screenshot of external tool selection window. The bottome of the window has a red box drawn around the URL field and Page Name field indicating these need completed. The 'Add Item' button has a red circle indicating it should be selected after information has been entered.
Screenshot of Canvas module after the social annotation item has been added.
Accessibility Best Practices for Social Annotation

Use Accessible PDFs 

Before uploading a PDF to Leganto: 

✓ Verify that text is selectable and searchable. 

✓ Avoid scanned image-only PDFs. 

✓ Ensure headings and document structure are preserved. 

✓ Check that images, charts, and diagrams include descriptive text when appropriate. 

Write Inclusive Annotation Prompts 

When creating discussion questions: 

✓ Use clear, concise language. 

✓ Avoid unnecessary jargon. 

✓ Provide context for complex questions. 

Example 

Less Accessible 

Analyze the epistemological implications of the author's argument. 

More Accessible 

What do you think the author is trying to prove? Highlight a passage that supports your interpretation and explain why you selected it. 

Consider Color and Highlighting 

✓ Do not rely solely on color to communicate meaning. 

✓ Include text explanations in comments. 

✓ Use annotations to explain why a passage is important. 

Example 

Instead of: 

"Highlight everything important in yellow." 

Use: 

"Highlight a passage that you believe best supports the author's main argument and explain your reasoning." 

Support Screen Reader Users 

Students using assistive technology may experience annotation content differently. 

Faculty can help by: 

✓ Writing meaningful annotation comments. 

✓ Using complete sentences. 

✓ Avoiding excessive abbreviations or symbols. 

✓ Providing alternative descriptions for visual content discussed in the reading.